![]() USU
››
Programs for business automation
››
Program for clinic
››
Instructions for the medical program
››
USU
››
Programs for business automation
››
Program for clinic
››
Instructions for the medical program
››
![]() These features are available only in the Standard and Professional program configurations.
These features are available only in the Standard and Professional program configurations.

Importing data from Excel is not difficult at all when using our program. We will consider an example of loading a list of clients from an Excel file of a new sample XLSX into the program.
Opening the module "patients" .
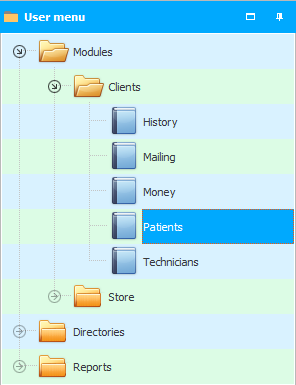
In the upper part of the window, right-click to call the context menu and select the command "Import" .
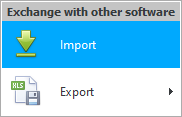
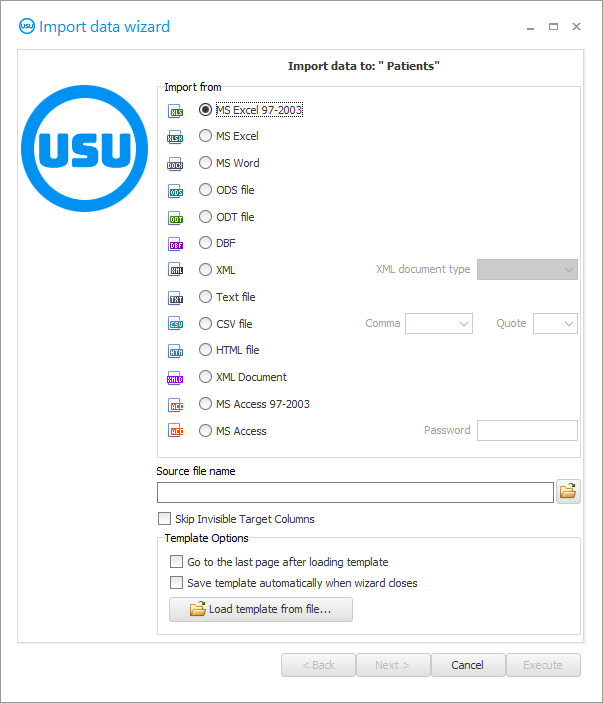
A modal window for data import will appear.
![]() Please read why you will not be able to read the instructions in parallel and work in the window that appears.
Please read why you will not be able to read the instructions in parallel and work in the window that appears.
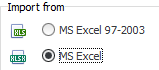
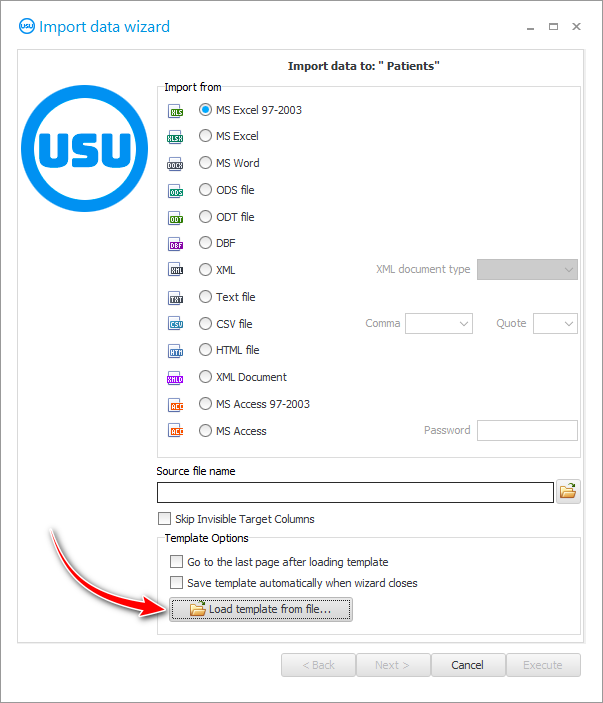
To import a new sample XLSX file, enable the ' MS Excel 2007 ' option.

Note that the file we will be importing has standard fields. These fields are available in the client card. If you want to import fields that don't exist, you can order their creation from the developers of the ' USU ' program.
For example, this is how an Excel file template for importing patients might look like.

But these fields in the program. We fill in these fields when manually registering a new client. It is in them that we will try to import data from an Excel file.

Field "Name" must be filled in. And other columns in the Excel file can remain empty.
When the import file format is specified, select the file itself to be loaded into the system. The name of the selected file will be entered in the input field.
Now make sure that the selected file is not open in your Excel program. Otherwise, the import will fail, as the file will be occupied by another program.
Click the ' Next ' button.

After the specified Excel file will open in the right part of the dialog box. And on the left side, the fields of the ' USU ' program will be listed. We now need to show in which field of the ' USU ' program information from each column of the Excel file will be imported.
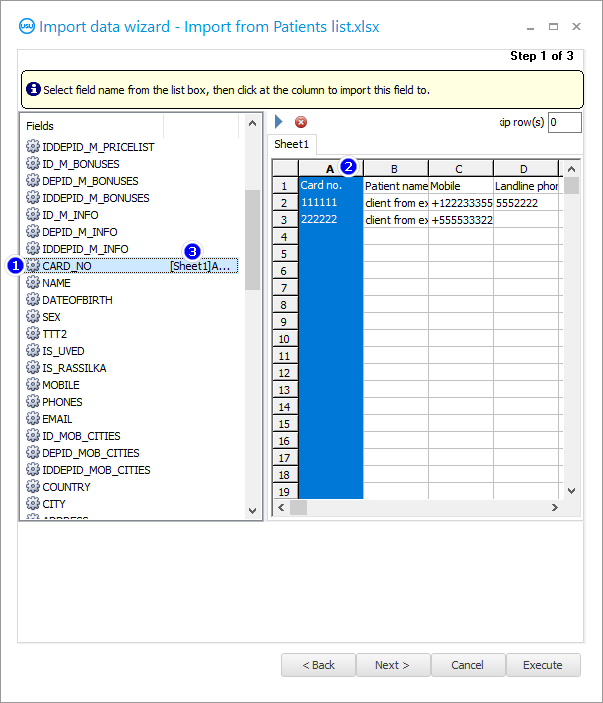
First click on the ' CARD_NO ' field on the left. This is where the patient card number is stored.
Next, click on the right side of the column heading ' A '. It is in this column of the imported file that the card numbers are listed.
Then a connection is formed. ' [Sheet1]A ' will appear on the left side of the field name ' CARD_NO '. This means that information will be uploaded to this field from the ' A ' column of the excel file.
By the same principle, we associate all other fields of the ' USU ' program with the columns of the Excel file. The result should be something like this.

Now let's figure out what each used field for import means.
CARD_NO - card number.
NAME - the name of the patient. Surname, name and patronymic.
MOBILE - cell phone.
PHONES - other phones, such as a home phone number.
All fields have intuitive names. It is enough to know simple English words to understand the purpose of each field. But, if you still, something is not clear, you can safely contact technical support .

Note in the same window that you need to skip one line during the import process.
Indeed, in the first line of the Excel file, we do not contain data, but field headers.
Click the ' Next ' button.
' Step 2 ' will appear, in which formats for different types of data are configured. There is usually no need to change anything here.
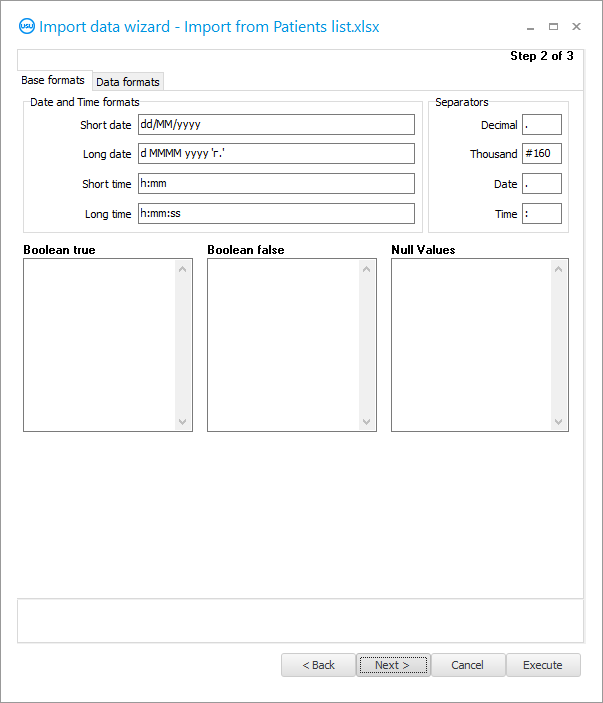
Click the ' Next ' button.
' Step 3 ' will appear. In it, we need to set all the ' checkboxes ', as shown in the figure.
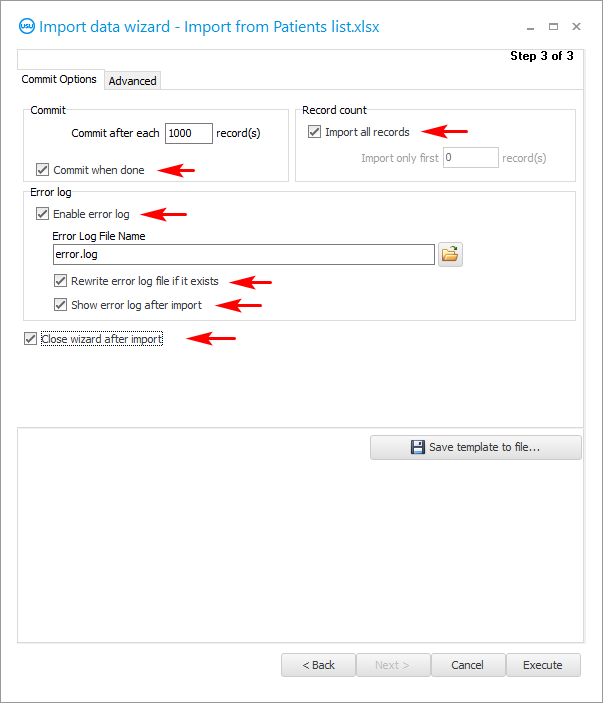
If we are setting up an import that we plan to do periodically, then it is better to save all the settings in a special settings file so as not to set them every time.
It is also recommended to save the import settings if you are not sure that you will succeed the first time.
Press the button ' Save template '.
We come up with a file name for the import settings. It is better to save it in the same place where the data file is located, so that everything is in one place.

When you have specified all the settings for import, we can start the import process itself by clicking on the ' Run ' button.
After execution, you can see the result. The program will count how many lines were added to the program and how many caused an error.
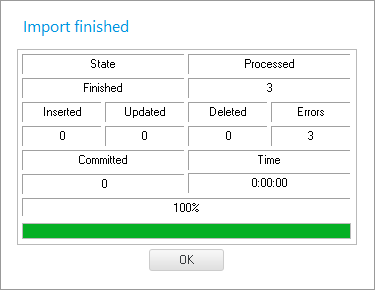
There is also an import log. If errors occur during execution, they will all be described in the log with an indication of the line of the Excel file.
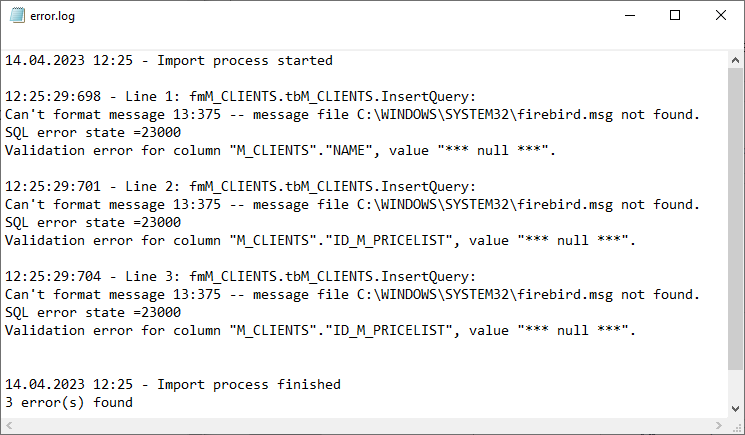

The description of the errors in the log is technical, so they will need to be shown to the ' USU ' programmers for them to help with the fix. Contact details are listed on the website usu.kz.
Click the ' Cancel ' button to close the import dialog.
We answer the question in the affirmative.

If not all records fell into an error, and some were added, then before trying to import again, you will need to select and delete the added records in order to exclude duplicates in the future.

If we try to re-import the data, we call up the import dialog again. But this time in it we press the button ' Load template '.
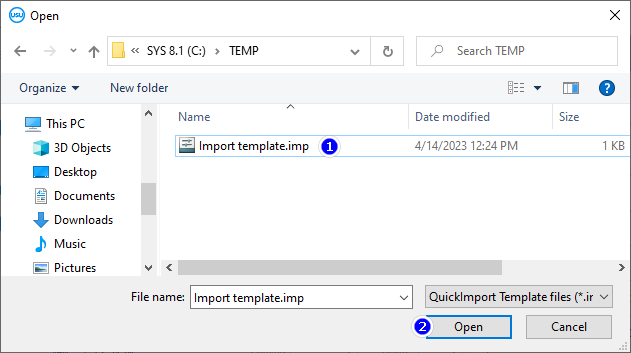
Select a previously saved file with import settings.
After that, in the dialog box, everything will be filled in exactly the same way as it was before. Nothing else needs to be configured! The file name, file format, links between fields and columns of the Excel table, and everything else becomes filled in.
With the ' Next ' button, you can go through the next steps of the dialog just to make sure of the above. And then click the ' Run ' button.

If all errors have been corrected, then the data import execution log will look like this.
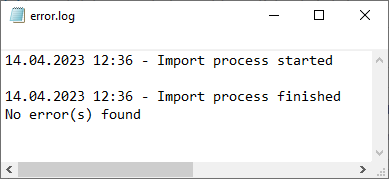
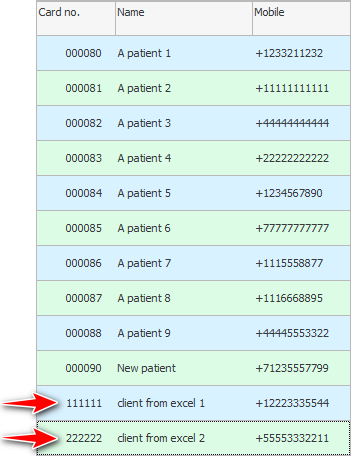
And the imported records will appear in the table.
See below for other helpful topics:
![]()
Universal Accounting System
2010 - 2024
 Download the program with interactive training