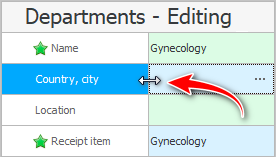
What are screen dividers? Let's find out now! For example, open the directory "divisions" and then enter the mode editing any line. Please look at the vertical line that separates the left side with field headers from the right side with input data. This is a separator. You can grab it with the mouse to move it to the side, if in some particular directory you need to allocate more space for headings or, conversely, for information.

When you close the data editing window, this setting will be saved, and next time you will not need to change the width of the areas again.
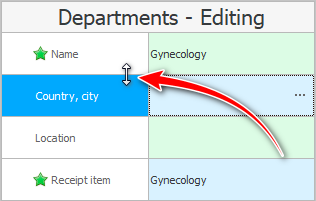
In the same way, you can grab the mouse over the border that separates the lines. This way you can change the height of all rows at the same time.

This is especially convenient when there are a lot of fields in some table, which do not all fit even if there is a large monitor. Then, for greater compactness, all lines can be made narrower.

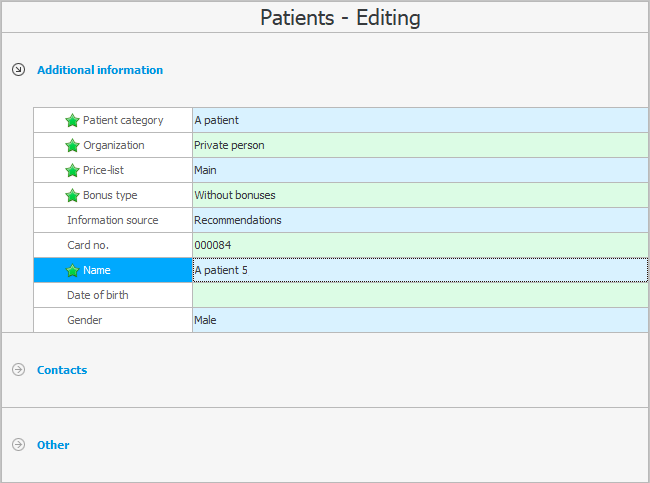
Now let's open the table which contains "many fields" and also enter the mode editing any line. You will see groups separating all fields by topic. This is very easy to understand. Even very large tables become easy to navigate.
Rarely used groups can be collapsed by clicking on the arrow on the left.

Using the mouse, groups can be given a separate height, which will differ from the height of the rows with data.

Related tables too "separate" separator from the top main table.


In the window ![]()
![]() audit also has a separator that separates the information panel from the list of actions performed in the program. The divider can be fully collapsed or expanded with a single click. Or you can stretch it with the mouse.
audit also has a separator that separates the information panel from the list of actions performed in the program. The divider can be fully collapsed or expanded with a single click. Or you can stretch it with the mouse.

See below for other helpful topics:
![]()
Universal Accounting System
2010 - 2025