
Instructions for the program for the store
Product photo
Working with product images in the program
Also, for your convenience, the software has a function of loading product images directly into the product range. This is required so that the cashier does not accidentally confuse goods during work and can always distinguish them by their appearance. There are 2 ways to upload an image to the program: from a finished file on your computer, or capture an image directly from your webcam. Let's take a closer look at each of them.
Loading product image from file
You can upload a file in PNG, JPEG, JPG format. To do this, you need to select the product in the nomenclature, the image of which we are going to upload, then at the bottom in the "Images" plate with the usual actions, add a new item. A window will appear, where in the only item "Image" you will need to right-click and select the item "Load ..."
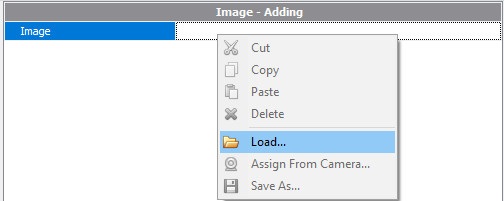
In the window that appears, select the file on your computer.
Get product image using webcam
An alternative way to download an image is to capture from a webcam. For this to be possible, first you need to connect your webcam to your computer and check if it works. After that, you can simply select the item "Capture from the camera", point to the product and take a photo of it. The product photo will be automatically uploaded to the file.
Image dimensions when displayed
As soon as you upload the photo and click OK, the image will appear. But it will be very small to see anything there. If you wish, you can resize the image to the optimal one. This is done as with ordinary files in a Word: move the mouse to the edges of the image and stretch it in the desired direction.