![]() USU
››
Programs for business automation
››
Program for the shop
››
Instructions for the program for the store
››
USU
››
Programs for business automation
››
Program for the shop
››
Instructions for the program for the store
››
![]() These features are available only in the Standard and Professional program configurations.
These features are available only in the Standard and Professional program configurations.
![]() Learn the basic principles first
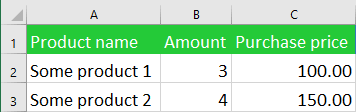
Learn the basic principles first ![]() importing data on the example of a one-time download of information about the product range into the program.
importing data on the example of a one-time download of information about the product range into the program.
Now let's consider the case when imports need to be done constantly. For example, you work with a certain supplier who constantly sends "consignment note" in MS Excel format. Instead of wasting time on manually entering data, you can set up a template for importing information for each supplier
Different vendors may send different types of invoices. Let's look at the import using the example of such a template, where the fields with green headers should always be, and the fields with blue headers may not be in the electronic version of the invoice sent to us.
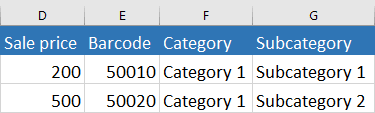
Also keep in mind that when importing an invoice, you will obviously have to skip not one line, like ours, which is reserved for column headings, but several lines, if the details in the imported invoice from above take up a lot of space.
First, add and save a new receipt from the desired supplier from the top. Then at the bottom of the tab "Composition" we no longer add records one by one, but select the command "Import" .
If the import is called for the correct table, the following inscription will appear in the window that appears.
The format is ' MS Excel '. Select a file to import. Press the ' Next ' button. Set up the connection of fields with columns of an excel table.
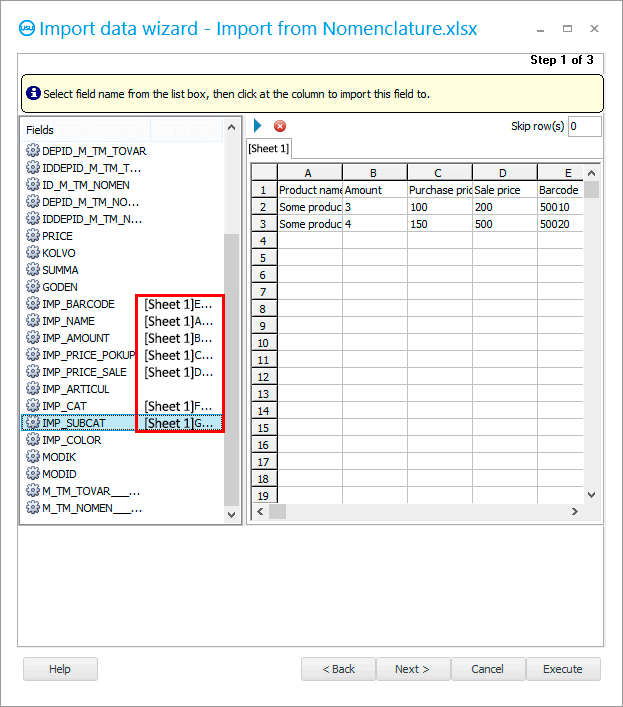
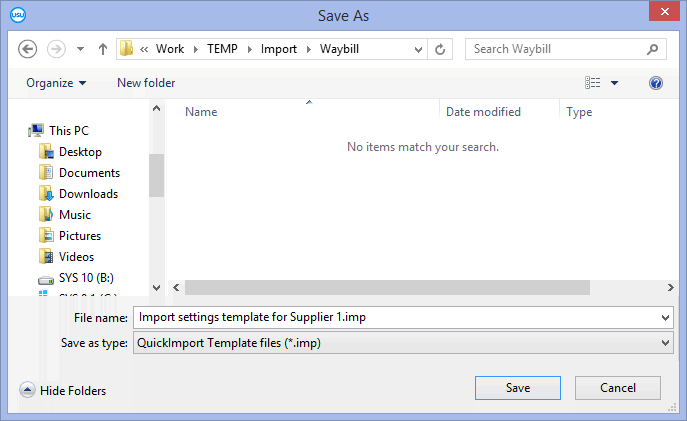
Press the ' Next ' button twice in a row. Then turn on all the ' checkboxes '. And be sure to click the ' Save template ' button, since we can often do imports from a supplier.
We give the name for the import settings file such that it makes it clear for which supplier of the goods these settings are.
Press the ' Execute ' button.
That's all! Now you will be able to load the saved template with import settings and import each waybill from the goods supplier.
See below for other helpful topics:
![]()
Universal Accounting System
2010 - 2024
 Download the program with interactive training